Friday, April 12, 2013

Lathe Progress

I have an update on the lathe.
This is the housing for the head stock:


This is the assembly - an 8" bolt for the shaft, v-belt pulley, lawnmower bearings and shaft collars to hold it together. The large nut at the right end will be modified to be a drive center.


This is the assembled headstock. the base is tapped for 3/8" bolts to holt it firmly to the lathe bed. 


More updates coming soon.

Monday, April 8, 2013

coming down the pipeline

So, I was thrift shopping and ran across an old lathe. I didn't buy it (shocker) but thought the premise was good. I have been sitting on a salvaged treadmill motor and controller for some time, and thought that I could replicate the style of the lathe in a larger format (also using as much scrap/salvage as possible).
Here is the inspiration:
Here is the current construction (lathe bed completed. headstock, tailstock, toolrest in process:
For the motor, I have the aforementioned treadmill motor. This is a 130VDC 3HP motor. The controller is an MC2100, fairly standard for recent treadmills. It came from an abandoned treadmill, found dumped near my neighborhood. The motor and controller were perfectly intact, but the controller was more or less useless without the treadmill's dashboard. So I poked around on the internet and found a way to interface an arduino microcontroller to provide the necessary pulses to make the treadmill motor run.

It has a pretty high top speed, close to 4000 rpm's. I will gear it down when attaching it to the lathe, maybe 4:1. Also, I hope to replace the full-size arduino with a smaller clone, and maybe add more features like a tachometer.


CNC update April 2013

It's been a while since I posted about the CNC machine. In the past year I have changed jobs and have been staying pretty busy. I found some time here and there to work on the CNC but made some great headway in February. My main problem was the Z axis. The original design was flimsy, so I beefed up the structure a little more. Also, I spent a lot of time making the individual parts, working on accuracy and alignment. In tests this axis moves so smoothly that it makes me realize how sloppy the X axis is. Some other projects are on the front burner now, but I am close to being up and running.


I am a cool dad.

My 10 year old has been reading through the Lord of the Rings Trilogy. She just finished it last week, in fact. While she was reading, she showed me the maps in the back of the book. There were 4 separate pages, like a larger map of Middle Earth had been chopped up. So, I scanned each page and used the photoshops to blend them back together into one.  Here is the result:
Big thanks to Grandma and Grandpa for sending her The Hobbit for her 10th birthday.

Wednesday, May 30, 2012

Bike Locker

I built a bike locker in the back yard.
For a long time the bikes lived in the back yard, but the constant sun exposure was wearing on them, so for a while we stored them in the garage. They were just in my way too much in there. So I built the bike locker. The lid is hinged along the back. I plan to put doors on eventually, but for now they are out of the sun.


Smokin' Meats

On Monday I used the UGLY DRUM SMOKER to smoke some various meats.
Since I built it over a year ago but never did a detailed post on it, I thought I'd show some pictures of it here, too.


The UDS is a popular design for DIY'ers in to BBQ. It gets great results at a fraction of the price of a professional (even low-end) smoker. Plus you have the satisfaction of having made it yourself...

You start with a 55-gallon drum, I sourced mine from the local soda bottler. From there, you need to make a charcoal basket, mount a grill near the top and drill some air intake holes near the bottom. That's the basic design but there are numerous other embellishments people decide to make with theirs.


Here is the lid. It fits snugly around the rim. I have added a handle and a chimney with a dowser. There is also a temperature gauge.
This shows how the lid hooks on to the rim. This is a coat-hook riveted to the lid.


Down inside is the charcoal basket. It's made from steel mesh and sits 3" off the bottom for air circulation. It has a handle that allows me to lift it in and out with a steel rod/hook I made.
Also you can see the bolts that support the grill, and another thermometer mounted through the side.
At the very bottom is a layer of foil to make it easire to clean.


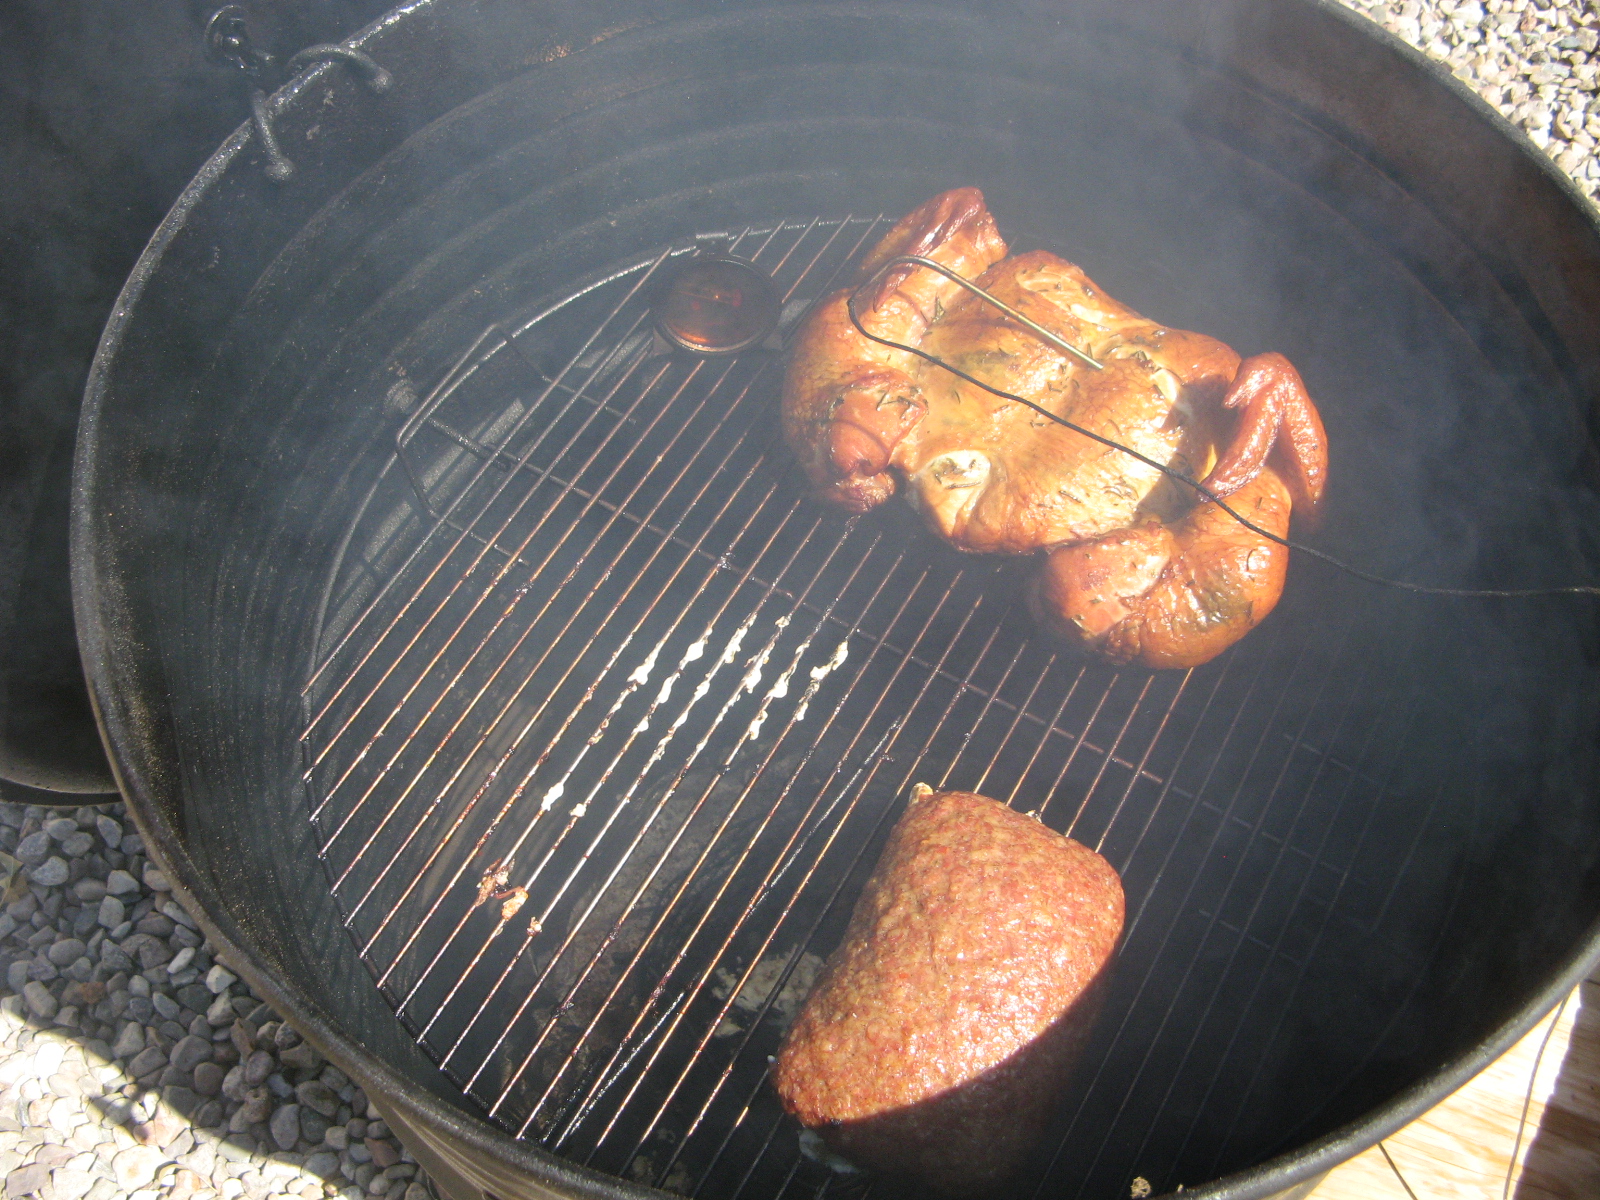
Here's some food cooking, a turkey and a pork shoulder. These were just added.


Here is a chicken (nearly done) and a stuffed pork sausage roll.


 Here's a stuffed pork roll in prep. It's one mild pork sausage spread out, then a mixture of softened cream cheese, shredded cheddar, salsa verde and a chopped jalapeno are all spread on.
 Next it's rolled up and the ends sealed. One to two hours on the UDS and these are ready to go. My favorite.
Here is the turkey. It cooked for 4 hours. The pork shoulder cooked for 8. The chicken cooked in 3 hours.
The great thing about the UDS is that it only took about 8-10 lbs. charcoal to do all this. It held temperature (250 F) all day long with little adjustment needed.

Monday, May 28, 2012

Clothesline


I put up a clothesline in the backyard.   
The posts are landscaping timbers from Home Depot (on sale this weekend for $1.49 each.)
 I used a circular saw to half-lap the pieces where they join. I bolted them together with carriage bolts.


 Each end has hooks (the other end has closed eye hooks). I can adjust the tension later with the hooks you see.
Each post is set in a 12" deep hole, set in with cement.


The total cost was $30.00 The hardware was the most expensive, those costs add up.
This all went up in a morning, the cement was setting overnight, and the clothesline was strung the next day.
Drying clothes on this instead of in the house should help keep the house cooler in the summer.