Friday, December 23, 2011

Smoked Turkey

I smoked a turkey for Christmas. Here are the pics:

Cooked for about 3 hours on the Ugly Drum Smoker. Prior to cooking I butterflied the bird, then rubbed butter and rosemary under the skin. Results were DELICIOUS!

Oh, and since turkeys were on such a great sale, I bought another to smoke sometime in the next few weeks...
Posted by Picasa

Minimalist dollhouses

Here's a look at one of the kids' Christmas presents; minimalist dollhouses
There are 2 large and 4 small units, 7"x7"x14" and 7"x7"x7", respectively.

The material is 1/2"baltic birch plywood with rabbeted glue joint edges.
I made these on the table saw at work with the Dado blade set for 1/4" wide rabbets. Brad nails and glue were also used in construction

Also, the "people" are clothes pins cut to Adult and Child heights on a band saw.
These have been a big hit so far, and a great way for the kids to be creative in their play.
Posted by Picasa

Candy Jar/Machine

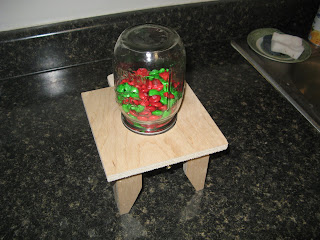
When Mrs. TG was a little girl her Granddaddy in NC used to give her M&M's from a dispenser he had made. It is a very fond memory for both her and her sister. Last summer we were at her Grandmother's house, and I took careful measurements on the candy jar so that I could build a replica. Except for a little metal spout I will add soon, here is the completed project:


It is built from 1/2" plywood (as the original was) and has a standard mason jar ring inset in the top for easy attachment of the candy jar.
Posted by Picasa

CNC Update - December 2011

After a long hiatus I return to the CNC machine
Thanks to the O's for this handy 24"x48' shelving system.
It makes the perfect home for the CNC machine, the electronics, computer, etc.

Here is a view showing the shelf setup. I bumped the shelf above the CNC upward, it will house control PC, the driver and power supply. Below the CNC is a shelf which will get a pullout tray for keyboard and mouse. Below that will be material storage. I plan to enclose the CNC area in plastic sheeting to control dust.

Tonight I tested out the axis motors. There were some flaws in my original wiring, I hope to rectify that tomorrow. Each axis works individually, though. The threaded rod motion is a little bouncy. My bearing system also gives a little lateral play in the X-axis.
More things on the To-Do list.
Posted by Picasa

Nixon in China - Opera Set

Recently I had the chance to build a set for the Eugene Opera's upcoming production of "Nixon in China"
The set consists of 17 walls that are 5' wide and 24' tall, with painted wood slats applied on the front.
Broken down into its component parts, we ripped over a mile in 1" wide MDf strips and built 56 theater flats in 1.5 days.
Here are some process shots.


Tony and Adam apply the wood-grained slats to the base coated walls. This jig I built helped to keep the spacing.


Walls getting a light paint spatter.


Lower wall sections stacked in the theater


Wood-graining party in the paint shop


This is an elephant carved from 6" thick Styrofoam. These are unfinished base coat layers.
The sculptor/painter is a Chinese ex-pat, living in the US and a retired scenic artist.


Walls painted and laid out


another angle


Stacked and ready to ship to Oregon


Saturday, September 3, 2011

Wire Shelving

I got ahold of some used wire shelving and it was just enough to make some shelves in the girls' closet.

Here are the before and after pictures:

I decided to do this a little more cheaply than buying ALL the specific hardware and clips.
Along the back edge I just installed some painted 1x2 into the studs.

The end brackets were on sale at Lowe's. They were under $2 each.

I had a little help:


The closet with some of the girls' things in it:

Posted by Picasa

Friday, August 5, 2011

CNC Update - again

I finished the Y axis and Z axis. They are shown below.

The Y axis will be driven back and forth along the gantry. The Z axis consists of the 2 horizontal pieces bolted in place. They will move up and down and will have a dremel attached via a toolholder. You can see the Z motor mounted in the picture.
Posted by Picasa

Monday, August 1, 2011

CNC Update

Here's a look at how my CNC machine is shaping up:
This is the work area secured to the end supports.

This is the gantry, It will move back and forth down the length of the table.
The motor mounted on the side will drive the cutting tool back and forth along the gantry.

Here's another view.

This view shows the aluminum angle along the top of the gantry. I countersunk the screws to keep them flat as possible.

I have also been working on the electronics. The motors are ready to mount and plug into the controller. It's all getting very close to completion.
Posted by Picasa

Tuesday, July 19, 2011

Ikea Hacking Challenge - Part 3: Bench

So after cooling my heels for a few days I returned to the Ikea Hacking.
This is the bench that I made from the side of the Expedit bookshelf.
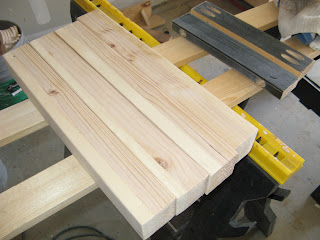
Nothing in the pile of Ikea parts fit the bill for the legs, so I made them from scrap 2x4 and 1x4 glued together then ripped on the tablesaw to 2x2. The rails of the apron were pulled from the pile of parts. Again, I used the Kreg jig to use pocket screws for attaching the legs to the apron.
The piece I used for the top was actually the side of the expedit shelf. The sides don't have any holes drilled on the outside face, so I used this as the top. The side facing down, as well as the ends, all have pre-drilled holes for attaching things. I will probably fill in the end holes and make them match.


Posted by Picasa